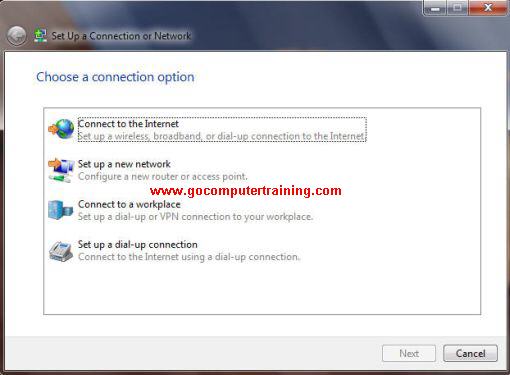
RHEL4 Servers Configuration
"A Contribution by ALI"
Samba Server Configuration
For samba server we have Linux on one side and other side WINDOWS.
Server Side
Ø First of all we copy the “smb.conf” file as “smb.conf.org”.
cp /etc/samba/smb. conf /etc/samba/smb.conf.org
Ø Open file in vi editor and write some statements in it.
vi /etc/samba/smb. conf
[Global Section]
· workgroup = saints (Domain Name)
· netbios name = bscs5 ( File server name. it gives in client side in run command. e.g \\bscs5)
· server string = saints server (optional)
· hosts allow = 192.168.0. 127.0.0.1 or 127.
· hosts deny = 0.0.0.0 / 0
· log file = /var/log/samba/ %m.log (% m means it replace by pc name)
· encrypt passwords = yes
· smb passwd file = /etc/samba/smbpassw d (All samba users r in it)
· unix password sync = yes
· interfaces = eth * lo
· bind interfaces only = yes
· local master = yes
· os level = 64
· domain master = yes
· preferred master = yes
· domain logons = yes
· logon script = netlogon.bat
· add user script = /usr/sbin/useradd –d /dev/null –g machines –s /bin/false –M %U
· logon drive = Z:
· logon path =\\%L\profiles\ %U
· wins support = yes
[Shared Section]
[Homes]
· path = /home/samba/ profiles/ %U
· browsable = no
· writeable = yes
· create mode = 0750 (Files permissions)
· directory mode = 0775 (Directories permissions)
[netlogon]
· path = /home/netlogon
· browsable =no
· write list = @admins (it’s a group name)
[Profiles]
· path = /home/samba/ profiles
· browsable = no
· writeable = yes
· create mask =0600
· directory mask = 0700
· guest ok = yes
Now we make one folder that can access all users.
[Shared]
· path = /home/shared
· writeable = yes
· browsable = yes
· force create mode = 0775
· force directory mode = 3770
· guest ok = yes
· create mask = 0765
First press Esc button then write :wq.
Ø Now restart service
service smb restart
Ø Create groups and directories.
· groupadd –g 600 admins
· groupadd –g 601 machines
· mkdir /home/samba
· mkdir /home/netlogon
· mkdir /home/samba/ profiles
· chmod 1757 /home/samba/ profiles
· chmod 0775 /home/netlogon
· chown root.admins /home/netlogon
Ø Create user in linux.
· adduser muneeb
· passwd muneeb (press enter then its asked to enter passwd)
Ø Now add user in samba.
· smbpasswd –a muneeb (-a means if user not exist in samba then it add otherwise create and give password).
· smbpasswd muneeb (press enter then its asked to enter passwd).
Ø Now we create home directory for samba user in profiles.
· mkdir /home/samba/ profiles/ muneeb
· chown muneeb /home/samba/ profiles/ muneeb (Here 1st Muneeb is samba user and 2nd Muneeb is directory).
· chgrp muneeb /home/samba/ profiles/ muneeb (Here 1st muneeb is group name and 2nd Muneeb is directory).
Note:-
When we create user then its group with the same name is also created.
Ø Now we apply some commands on sheel.
· Useradd –d /dev/null –g machines –s /bin/false –M meebe (Here meebe is a client pc name).
· vi /etc/passwd (File open in vi editor and search meebe and write $ at the end of the meebe. Like this (meebe$)
· smbpasswd –am meebe (meebe is added into samba).
Ø Now check the samba configuration on server side.
· smbclient //bscs5/profiles –U muneeb (when we press enter then it will asked to enter password. We enter the Muneeb user’s password).
Ø Write this command to check the “etho” in the firewall settings.
· system-config- securitylevel
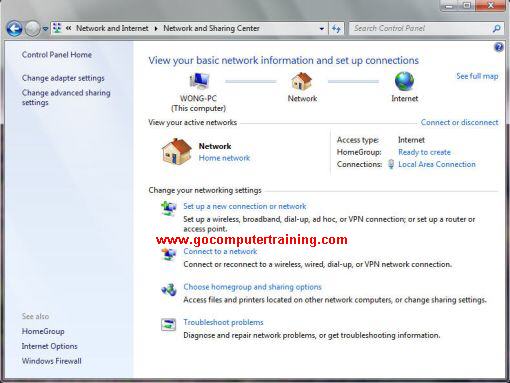
Client Side
My Computer èProperties è Computer NameèChange
Enter Domain name is “saints”.
Then a small window is open and its will required user name and password. We will enter the privileged user and its password. (user name = Root and its password).
“Welcome to the saints domain” message shown and restart pc and login with samba user. If some error comes then we also have some changes.
StartèrunèregeditèHKEY_LOCAL_MACHINEèSYSTEMèCurrentConsoleSet èServicesèNetlogonèParameters
Double click on “requiresignorseal” and write 0 at the place on 1. And restart pc and again loin with samba user.
NIS SERVER Configuration
NIS stands for “Network Information System”. NIS servers are typically used to synchronize account information. They can share the contents of /etc/passwd, /etc/shadow and /etc/group files. For NIS server both pc have Linux.
Server Side
Ø Start NIS services
· service ypserv restart
· service portmap restart
Ø Open file in vi editor and add one line.
· vi /etc/sysconfig/ network
· NISDOMAIN = saint
Ø Restart the service
· service ypserv restart
Ø Now create one file and write some lines.
· vi /var/yp/securenets
· 255.255.255. 255 127.0.0.1
· 255.255.255. 0 192.168.0.0
Ø Restart the services
· service portmap restart
· service ypserv restart
· service ypxfrd restart
Ø Simple open file search “all” word. For search first press Esc then write /all: and press enter.
· vi /var/yp/Makefile
Ø write command for master server. It generate NIS maps show output in shell then press ctrl+d to move next then press y.
· /usr/lib/yp/ ypinit –m
Ø Restart the services and also permanent on.
· service portmap restart
· service ypserv restart
· service yppasswdd restart
· service ypxfrd restart
· chkconfig portmap on
· chkconfig ypserv on
· chkconfig yppasswdd on
· chkconfig ypxfrd on
Ø Now we create an NIS user
· adduser –u 1000 nisuser
· passwd nisuser nisuser
Ø Now move into /var/yp directory and write “make”. After the creation of every user.
· cd /var/vp
· make (It generates token of nisuser).
Ø Test to check services. [Optional]
· ps –auxf | grep yp
Ø Start the sshd service and also permanent on.
· service sshd restart
· chkconfig sshd on
Ø Write this command to check the “etho” in the firewall settings.
· system-config- securitylevel
Client Side
Ø First of all we check some RPMS that should be available on client side.
· rpm –qa | grep portmap
· rpm –qa | grep ypbind
· rpm –qa | grep yp-tools
· rpm –qa | grep authconfig
Ø To give NIS domain name and IP write this line.
· system-config- authentication –gui (One window is open check the “enable NIS Support” and click on “Configure NIS” button).
· NIS domain name = saint
· IP Address = IP Address of Server
Ø Start the ypbind service.
· service ypbind start
if OK then successful if error then check the log file.
· tail f /var/log/messages
Ø Restart the services
· service sshd restart
· service portmap restart
· service ypxfrd restart
· service ypbind restart
Ø Write some commands on shell.
· ypwhich (Display the IP address of server)
· ypcat passwd (It should display the password file of server machine).
· getent passwd (Display local password file & maps should be displayed).
Ø Create home directory of nisuser and also change its permissions.
· mkdir /home/nisuser
· chmod 700 /home/nisuser/
Ø Copy files into nisuser directory and also change its owner.
· cp /etc/skel/.* /home/nisuser/
· chown –R nisuser:nisuser /home/nisuser/ (Here 1st nisuser is user name, 2nd nisuser is group name and 3rd nisuser is directory name).
Ø Restart the ypbind service and also write ypmatch statement.
· srvice ypbind restart
· ypmatch nisuser passwd
Ø Restart and permanent on all services.
· srvice ypbind restart
· service portmap restart
· service ypxfrd restart
· service sshd restart
· chkconfig ypbind on
· chkconfig portmap on
· chkconfig ypxfrd on
· chkconfig sshd on
Ø Write this command to check the “etho” in the firewall settings.
· system-config- securitylevel
NFS Server Configuration
NFS stands for “Network File System”. It is use for sharing of files on network. For sharing of files we have Linux on both sides.
Server Side
Ø First of all open the “exports” file and give shares line by line. One share in one line.
· vi /etc/exports
· /mnt/share *(ro or rw,async,no_ root_squash or root_squash)
· Press Esc then write :wq.
· exportfs -ra
Here * shows all IP Address
“ro” means read only and “rw” means read write.
Ø Make Directory and also change its permissions.
· mkdir /mnt/share
· cd /mnt/share
· mkdir a b c
· cd ..
· chmod –R 1777 share/
Ø Restart and permanent on the service.
· service nfs restart
· chkconfig nfs on
Client Side
Ø Restart and permanent on the service.
· service nfs restart
· chkconfig nfs on
Ø Make Directory
· mkdir /mnt/myshare
Ø Mount and Umount the share directory.
· mount 192.168.0.2: /mnt/share /mnt/myshare
· umount 192.168.0.2: /mnt/mysahre
Here 192.168.0.2 it’s a server ip address.
/mnt/share it’s a source.
/mnt/myshare it’s a destination.
Ø Restart and permanent on the service.
· service nfs restart
· chkconfig nfs on
SQUID Server Configuration
It’s a caching server that is use to provide the internet facility of clients.
Server Side
Ø For SQUID server SAMBA server should be configured. And check the SQUID package.
· rpm –qa |grep squid
Ø After install the SQUID package then apply this command for creating the subdirectories for the caching purpose.
· squid –Z
Ø Now open the squid config file in vi editor.
· vi /etc/squid/squid. conf
Ø Now changes in file.
· acl clients src=192.168.0.0/ 24 (Here we declare a variable with the name clients and we store IP range in it).
· http-access allow clients
· http-access deny all
Client Side
Click on Internet ExplorerèToolsèInternet OptionsèConnectionsèLAN Settings
In proxy server give IP Address of server in Address Field and in Port field give port number is “3128”. It’s a by default port number we can’t change it. And restart the computer.
Apache Server Configuration
It is a web server.
Web Hosting
The World Wide Web is a massive collection of web sites, all hosted on computers (called web servers) all over the world. The web server (computer) where your web site's html files, graphics, etc. reside is known as the web host. Web hosting clients simply upload their web sites to a shared (or dedicated) webserver, which the ISP maintains to ensure a constant, fast connection to the Internet.
Ø First of all open the configuration file of apache.
· vi /etc/httpd/conf/ httpd.conf
Ø Simply we make some changes in it
· Search the word “UserDir disable” and remark it by # sign. By default it is unmark.
· Search the word “UserDir public_html” and unmark it by removing the # sign. By default it is mark.
· We can write “MyWeb” at the place of “public_html” because it’s a optional.
· In a “directory” tag we write “/home/*/MyWeb “.
· Save the file.
Ø Now create a new user and change its permissions.
· useradd apache1.
· chmod 711 /home/apache1
Ø Make a Directory and also change its permissions.
· mkdir /home/apache1/ MyWeb
· chmod 755 /home/apache1/ MyWeb/
Ø Restart the service.
· service httpd restart
Ø Simply make a HTML or PHP file and save it into /home/apache1/ MyWeb path.
Ø To Access the file write on the browser.
· http://localhost/ ~apache1/ filename of html
Password Protected Folders
It means when we want to access the files through browser then is asked for user authentication.
Ø Make a Directory.
· mkdir /var/www/html/ web
Ø Open the configuration file of apache.
· vi /etc/httpd/conf/ httpd.conf
Ø Simply we add some lines in it
· Make a directory.
· (Here /var/www/html its document root we must write it)
· AuthType basic
· AuthName “Please Login to Access the Files”
· AuthUserFile /home/apache1/ .mypasswd
· Require valid-user
·
· Save the file
Ø Now we add user in “.mypasswd” file for this we write some commands on shell.
· htpasswd –c /home/apache1/ .mypasswd apacheuser1 (Only first time we write –c by adding user next time we don’t write –c. “apacheuaer1” it’s a user name that we want to add in a file.)
· give password of apacheuser
· htpasswd /home/apache1/ .mypasswd apacheuser2
Ø Now restart the service.
· service httpd restart
Ø For removing user we manually remove it from file.
Ø To view the .mypasswd file write “vi /home/apache1/ .mypasswd” .
Ø .mypasswd file users and their encrypted passwords are in it.
FTP SERVER Configuration
Server Side
Ø How To Get VSFTPD Started
You can start, stop, or restart VSFTPD after booting by using these commands:
[root@bigboy tmp]# service vsftpd start
[root@bigboy tmp]# service vsftpd stop
[root@bigboy tmp]# service vsftpd restart
To configure VSFTPD to start at boot you can use the chkconfig command.
[root@bigboy tmp]# chkconfig vsftpd on
Ø Testing the Status of VSFTPD
You can always test whether the VSFTPD process is running by using the netstat -a command which lists all the TCP and UDP ports on which the server is listening for traffic. This example shows the expected output.
[root@bigboy root]# netstat -a | grep ftp
tcp 0 0 *:ftp *:* LISTEN
[root@bigboy root]#
If VSFTPD wasn't running, there would be no output at all.
Ø Now open the FTP configuration file. Simply read it.
· vi /etc/vsftpd/ vsftpd.conf
Ø The /etc/vsftpd. ftpusers File
For added security, you may restrict FTP access to certain users by adding them to the list of users in the /etc/vsftpd. ftpusers file. The VSFTPD package creates this file with a number of entries for privileged users that normally shouldn't have FTP access. As FTP doesn't encrypt passwords, thereby increasing the risk of data or passwords being compromised, it is a good idea to let these entries remain and add new entries for additional security.
Ø Anonymous Upload
If you want remote users to write data to your FTP server, then you should create a write-only directory within /var/ftp/pub. This will allow your users to upload but not access other files uploaded by other users. The commands you need are:
[root@bigboy tmp]# mkdir /var/ftp/pub/ upload
[root@bigboy tmp]# chmod 722 /var/ftp/pub/ upload
Ø FTP Greeting Banner
Change the default greeting banner in the vsftpd.conf file to make it harder for malicious users to determine the type of system you have. The directive in this file is.
ftpd_banner= Welcome to the Saints FTP Server
Ø FTP Users with Only Read Access to a Shared Directory
In this example, anonymous FTP is not desired, but a group of trusted users need to have read only access to a directory for downloading files. Here are the steps:
1) Disable anonymous FTP. Comment out the anonymous_enable line in the vsftpd.conf file like this:
# Allow anonymous FTP?
anonymous_enable= NO
2) Enable individual logins by making sure you have the local_enable line uncommented in the vsftpd.conf file like this:
# Uncomment this to allow local users to log in.
local_enable= YES
3) Start VSFTP.
[root@bigboy tmp]# service vsftpd start
4) Create a user group and shared directory. In this case, use /home/ftp-users and a user group name of ftp-users for the remote users
[root@bigboy tmp]# groupadd ftp-users
[root@bigboy tmp]# mkdir /home/ftp-docs
5) Make the directory accessible to the ftp-users group.
[root@bigboy tmp]# chmod 750 /home/ftp-docs
[root@bigboy tmp]# chown root:ftp-users /home/ftp-docs
6) Add users, and make their default directory /home/ftp-docs
[root@bigboy tmp]# useradd -g ftp-users -d /home/ftp-docs ftpuser1
[root@bigboy tmp]# useradd -g ftp-users -d /home/ftp-docs ftpuser2
[root@bigboy tmp]# passwd ftpuser1
[root@bigboy tmp]# passwd ftpuser2
7) Copy files which u want to share b/w users into the /home/ftp-docs directory
8) Change the permissions of the files in the /home/ftp-docs directory for read only access by the group
[root@bigboy tmp]# chown root:ftp-users /home/ftp-docs/ *
[root@bigboy tmp]# chmod 740 /home/ftp-docs/ *
Users should now be able to log in via FTP to the server using their new usernames and passwords. If you absolutely don't want any FTP users to be able to write to any directory, then you should set the write_enable line in your vsftpd.conf file to no:
write_enable = NO
Remember, you must restart VSFTPD for the configuration file changes to take effect.
Client Side
Ø Here is a simple test procedure you can use to make sure everything is working correctly:
1) Connect to ftpuser1 via FTP
[root@smallfry tmp]# ftp 192.168.1.100 (Here 192.168.1.100 is a server IP address)
Connected to 192.168.1.100 (192.168.1.100)
220 ready, dude (vsFTPd 1.1.0: beat me, break me)
Name (192.168.1.100: root): user1
331 Please specify the password.
Password:
230 Login successful. Have fun.
Remote system type is UNIX.
Using binary mode to transfer files.
ftp>
As expected, we can't do an upload transfer of testfile to ftpuser1
ftp> put testfile
local: testfile remote: testfile
227 Entering Passive Mode (192,168,1,100, 181,210)
553 Could not create file.
ftp>
But we can view and download a copy of the VSFTPD RPM located on the FTP server ftpuser1
ftp> ls
227 Entering Passive Mode (192,168,1,100, 35,173)
150 Here comes the directory listing.
-rwxr----- 1 0 502 76288 Jan 04 17:06 vsftpd-1.1.0- 1.i386.rpm
226 Directory send OK.
ftp> get file name file name (e.g. index.html index.html.tmp)
local: index.html.tmp remote: index.html
227 Entering Passive Mode (192,168,1,100, 44,156)
150 Opening BINARY mode data connection for index.html (76288 bytes).
226 File send OK.
76288 bytes received in 0.499 secs (1.5e+02 Kbytes/sec)
ftp> exit
221 Goodbye.
[root@smallfry tmp]#
As expected, anonymous FTP fails.
[root@smallfry tmp]# ftp 192.168.1.100
Connected to 192.168.1.100 (192.168.1.100)
220 ready, dude (vsFTPd 1.1.0: beat me, break me)
Name (192.168.1.100: root): anonymous
331 Please specify the password.
Password:
530 Login incorrect.
Login failed.
ftp> quit
Ø File is save on root’s path.
Change Root’s Password without knowing the root password
Ø When grub boot select REDHAT LINUX and press ‘p’.
Ø Then enter the grub password.
Ø Now select require line and press ‘e’.
Ø At the end of the line press space and write ‘1’.
Ø Then press ‘b’.
Ø Now system boot and single mode display.
Ø Write passwd root
Ø Enter new password.
Ø Write Init 6. (It means restart computer).
Rebuild RPMS Database
Ø When our RPMS are damage then we rebuild these.
· rpm --rebuilddb -vvv
Check User Group
Ø When we want to know the user groups then write this command.
· groups username